Under the Hood with Windows Universal Projects

One of the main themes coming out of the keynotes and content at this year’s //Build 2014 conference was the continued convergence of the Windows Store and Windows Phone development platforms.  One exciting result of the fact that both these platforms now target very similar Windows Runtimes (WinRT and WinPRT, respectively) is the support for the new “Universal Apps” in Visual Studio 2013 Update 2.  (Another exciting result is that the “Programming the Windows Runtime by Example” book that Jeremy Likness and I wrote is even MORE relevant!) Projects created using the Universal App templates in Visual Studio include primary projects for each targeted platform as well as a shared project whose content “magically” gets included into each of the head projects.  Currently, only Windows 8.1 and Windows Phone 8.1 primary projects are supported, though apps targeting the Xbox One will one day be included, and Xamarin has indicated they’d be joining the fun soon. image
A Universal Apps Solution, showing Windows, Windows Phone, and Shared projects

I won’t spend a ton of time discussing the “how-to” aspect of Universal Apps projects – Jeff Prosise has published a series of blog posts that present the basics of working with those projects:

I want to focus on the mechanisms working behind-the-scenes that enables these things to work.  How does the Shared content make its way into the app projects in the solution, and why does it behave differently from other sharing mechanisms?  I find that understanding the inner workings of things leads to better decision making when employing them…perhaps that’s why I enjoy reading Jeff Richter’s books.

Where did they put the hood latch on this model?

So what is going on under the hood on these projects?  To understand that we need to get inside of the projects themselves.  Remember that most of the Visual Studio project files you work with (csproj, vbproj, etc) are actually MSBuild XML files.  You can examine this yourself by either opening the project files directly in a text editor (enhanced editors like Notepad++ or Sublime Text offer a better visual experience than good-old Notepad, but in a pinch, Notepad does work.)  You can also examine the inner content of a project file from Visual Studio itself with the following steps (or see here):

  • Right click on the project you want to work with in the Solution Explorer and select Unload Project
  • Right click on the project again and click Edit <ProjectName>

Regardless of what editor you choose to use, the content of your project files will follow the MSBuild Project File XML schema that is described here.  One of the jobs of the Visual Studio IDE is to properly maintain the various MSBuild schema elements as you add, remove, or rearrange items within your projects, but nothing prevents you from doing that manually, and there are actually a few MSBuild “tricks” that you can take advantage of that aren’t provided by the Visual Studio IDE.  Keith Rome has a blog post covering Wildcard Inclusions in C# Project Files that takes specific advantage of this capability.

Pay no attention to that man behind the curtain!

With one of the application project files open for XML editing, you can start to explore the magic of the Shared project.  Scroll down to the bottom of the file and locate the Import element that includes the attribute ‘Label = “Shared”’”:

<Import Project="..\UnderTheHood.Shared\UnderTheHood.Shared.projitems" 
Label="Shared" />

The purpose of the Import Element is to bring the contents of one project file into another project file, and a quick check of the MSDN docs suggests that it’s been around since at least .NET 2.0!  In this case, it is bringing in the contents of a file with a projitems extension from the shared project’s directory.  Note however that this file is NOT the shproj file that defines the Shared Project! (What gives?!) image
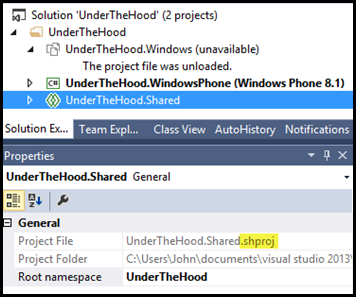
The Shared project extension is actually NOT what is referenced in the project files’ Import Element!

NOTE: You may also want to notice that there’s a Root Namespace property.  Setting this value determines the namespace that is given by default to new code files created within this shared project.

The projitems file is what the shared project creates/maintains.  If you open a File Explorer window to the Shared project file location, you will find this file.  Opening the file in a text editor (you can’t open it in Visual Studio while the shproj file is loaded, since it is already being referenced) will show that it is just another MSBuild file that includes the files that have been added to it  (if your text editor supports change notifications, add a new file to the Shared project while the projitems file is opened in the text editor and notice that when you save the project, the projitems file will be updated.)

So as you add, remove, or manipulate items in the shared project, the contents of the projitems file is updated, and this file’s contents in turn are simply incorporated into your app project files via the Import elements in their MSBuild XML.  This is why you can use #if declarations that are scoped to one project or another to differentiate behavior.

But wait, there’s (partially) more!

Remember that there’s more that you can do to affect your shared files’ integration behavior than simply throwing a bunch of #if and #else blocks throughout the shared code (ew!).  Don’t forget about partial classes and their often-overlooked cousins, partial methods. Partial methods first came on to the scene as a tool to allow developers to introduce code that strategically extended designer-generated files without having to worry about designer regeneration obliterating their code without having to create subclasses and override virtual methods.  When a partial class includes a partial method, private methods can call into that partial method, and partial extensions can choose whether or not to provide an implementation of the partial method. Wait…what?  Perhaps an example. I’ve added a new class to the shared project:

namespace UnderTheHood
{
    public partial class PartialClass
    {
        public void DoSomethingInteresting()
        {
            DoSomethingPlatformSpecific();
        }

        partial void DoSomethingPlatformSpecific();
    }
}

Note the lack of implementation for the DoSomethingPlatformSpecific method. Now in the Windows 8.1 project I’ve provided an implementation of the DoSomethingPlatformSpecific method:

namespace UnderTheHood
{
    public partial class PartialClass
    {
        partial void DoSomethingPlatformSpecific()
        {
            Debug.WriteLine("I am a Windows 8.1 implementation.");
        }
    }
}

And a slightly different implementation in the Windows Phone 8.1 project:

namespace UnderTheHood
{
    public partial class PartialClass
    {
        partial void DoSomethingPlatformSpecific()
        {
            Debug.WriteLine("I am a Windows Phone 8.1 implementation.");
        }
    }
}

Now calling the public DoSomethingInteresting method will call into whatever platform-specific DoSomethingPlatformSpecific implementation is in the current project, allowing for platform-specific customizations to occur in the platform-specific projects, rather than mixing them in the shared projects with #if and #else statements.  If new platforms are added to the Universal Project “universe” (sorry), you don’t have to worry about the #if statements becoming these big messes that include a lot of code that is greyed out by Visual Studio depending on which project it thinks is currently in scope. Bear in mind that partial methods differ from abstract methods in that they do not have to be overridden/implemented.  If no implementation is provided, the call into the partial method won’t fail or cause any negative side effects…it is simply a no-op.  As a consequence, there are a few rules to follow when working with partial methods:

  • They must return void (if they had return types, an implementation would be required)
  • That can have ref parameters, but not out parameters (if no implementation is provided, the ref parameter is unmodified)
  • Partial methods are inherently private in scope.
  • They can be static, and can be generic.
  • Delegates can only refer to implementations of static methods.

The bottom line

So hopefully now you have a better understanding of how these magical new shared projects work in Visual Studio.  Much of the technology they use has been in the DNA of our project files for a while.  Visual Studio 2013 Update 2 has been enhanced to include some nice new IDE updates in order to surface these features in a way that makes them very useful for writing reusable code.  This new compile-time reusability combines quite nicely with the post-compile reusability that is offered by Portable Class Libraries. If you want to learn more about them, Jeff Prosise will be delivering a session on universal apps at the Software Design & Development conference in London next month. The talk will delve into what universal apps are and how they’re structured, and he promises to have plenty of samples to share as he goes over the ins and outs of writing apps that target separate but similar run-times.  You might also benefit from watching Jeff’s video entitled Introduction to WinRT on WintellectNOW. If you’re not already a subscriber, you can sign up with the promo code Garland-13 and enjoy two weeks of access for free. Also, did I happen to already mention that Jeremy Likness and I had written a book about using the Windows Runtime?

New in Visual Studio 2013–Windows Azure Mobile Services Integration

As part of the build-up to the official launch of Visual Studio 2013 on Wednesday 11/13, Microsoft has been running a series of guest blog posts, authored by members of the Microsoft MVP community.  I was fortunate enough to have been selected to be one of the authors for the series, and my post was published today.  In it, you can read about the various ways that access to Windows Azure Mobile Services functionality has been integrated into Visual Studio 2013.

The article can be accessed through the Microsoft MVP Award Program Blog, and ultimately appears in its entirety on the Microsoft Press Blog.  If you are at all interested in seeing how Mobile Services can easily be used to enhance your Windows Phone or Windows Store app, check out the article, and feel free to drop me any questions.

Adding Intelligence to the IntelliSense for Windows Azure Mobile Services

Some of the members of the Visual Studio Windows Azure Tools & Mobile Services teams recently published instructions for “Enabling IntelliSense for Mobile Services JavaScript in Visual Studio.”  Since working with the Windows Azure Mobile Services (WAMS) server-side JavaScript files can be a little bit of a blind experience – debugging happens primarily through strategic placement of console.log statements and frequent examination of the Mobile Services server script reference on MSDN – even the littlest help goes a long way…though I am NOT saying that his IntelliSense support only offers “the littlest help.”

To get started, the JavaScript IntelliSense definition file can be downloaded from this link.  Additionally, there’s a ReadMe document that provides some supporting information available at this link.  The ReadMe file points out that the IntelliSense definition – in its current incarnation – is somewhat limited in its coverage (hey, it’s a start!)

Placing and Referencing the IntelliSense Definition File

The original article references two mechanisms for actually directing Visual Studio to make use of the reference file: adding an explicit reference to the precise path of the definition file on the local file system, and adding a reference to the definition file through the Tools/Options/Text Editor/JavaScript/IntelliSense/References panel in Visual Studio (under “Implicit (Web)”.)  Pros and cons of each approach were outlined, including:

  • Providing the path to the file within the script files themselves is a bit more work, since every script file needs to be modified;
  • Adding the Visual Studio reference results in a “pollution” of the JavaScript IntelliSense since Visual Studio doesn’t discriminate as to whether or not you’re working on Mobile Services scripts in order to choose what definition files to consult.

Now that the stage is set, I’d like to offer some tips for how to extract a little bit more from these IntelliSense files.

A Slight Change to Definition File References

There’s a small alteration that can be made to the list above to enable referencing the definition file.  My concern with the presentation of the approaches listed above is that they require the definition file to be in the same path location on every machine that is used to edit the JavaScript contents.  In my experience, this is a pain in the neck to achieve – even simply spanning my own development machines.  However, the JavaScript IntelliSense tooling does support relative paths.  With that in mind, I’d suggest putting the IntelliSense file into the WAMS script Shared directory and uploading it through Git (for more information on using the Microsoft Visual Studio Tools for Git to manage WAMS script files, see my previous article here), then adding relative references to “../shared/mobileservices.intellisense.js” either in the script files or in the Visual Studio settings dialog.

The screenshots below show this in use through the Visual Studio settings:

image

image

(* a note about working with the Visual Studio settings – if you’ve added your file path using absolute or relative paths and find that IntelliSense still is not coming up, it may be due to inserting the definition file reference in the wrong “Reference Group”, such as Implicit (Windows) – I call this out because it bit me MULTIPLE times.  Reference Groups are discussed in the MSDN documentation here.)

Note that since the file path is relative, when opening/working on JavaScript files in an HTML Web project, unless there’s a matching “mobileservices.intellisense.js” file within a folder titled “shared” relative to the file being worked on in that project, the WAMS IntelliSense won’t be included.

Likewise, including the relative file at the beginning of the WAMS JavaScript file itself has the same results:

image

While the upside to this approach is that other developers/other development machines acquire the IntelliSense simply by synchronizing the client and server repositories, there is a downside to this approach.  Interacting with scripts opened through the Windows Azure Mobile Services node in the Server Explorer will not include IntelliSense.  When these files are opened in Visual Studio, they are downloaded and opened from a temporary location on the local file system, so the Shared files are not placed in the location specified by the relative path.  I’m OK with this, as I’ve grown to prefer to use the source-control managed file editing and retrieval, and the Server Explorer doesn’t yet provide access to API Scripts or Shared Script content (though I have no doubt that it will soon…but I still like the “safety net” offered by working through Source control and the ease with which I can by using the integrated Microsoft Visual Studio Tools for Git.)

Providing Context

One of the problems with the IntelliSense solution is that there’s no information providing Visual Studio with insight as to how to handle the parameters in the script signatures.  The good news is that is not hard to do, and since these objects are frequently referenced within the WAMS scripts, being able to allow them to join in the “IntelliSense party” provides a lot of help.

Having Visual Studio include IntelliSense for these parameters is simply a matter of adding a JavaScript XML Documentation Comment for the method signature.  The IntelliSense comments for each of the table script methods follow. (Custom API scripts will be discussed in a second.)

Read:

function read(query, user, request) { /// <param name="query" type="Query"></param> /// <param name="user" type="User"></param> /// <param name="request" type="Request"></param>

Insert (Update uses the same XML comments):

function insert(item, user, request) { /// <param name="item" type="Object"></param> /// <param name="user" type="User"></param> /// <param name="request" type="Request"></param>

Delete:

function del(id, user, request) { /// <param name="id" type="Number"></param> /// <param name="user" type="User"></param> /// <param name="request" type="Request"></param>

With the comments in place that describe the types of the incoming parameters, the server-side scripts now get IntelliSense within Visual Studio:

Before:

image

After:

image

Working with IntelliSense in Custom API Scripts

The emphasis of this first JavaScript IntelliSense definition file was to provide support for Table operation scripts.  However, with a little help, Custom API scripts can also join in the fun.

Custom API scripts receive two parameters – request and response.  However, it is important to note that the request object used in Custom API scripts is not the same request object that is used in the table scripts…in fact, this object provides access to several objects that are directly used as parameters in the Table operation scripts.  This distinction is covered in the MSDN documentation for the request object.

Because I now maintain and reference a copy of the mobileservices.intellisense.js file within my source-control-managed “shared” folder, I can augment and/or make changes to the file with some confidence…when an update to the IntelliSense file is published, I can simply drop the file into place, and before committing and synchronizing the changes I can use a differencing tool to see what has changed.  Ideally, I will notice if the new file is about to lay-waste to the changes I’ve put in…so let’s change the definition file.

I’ve basically added some content to the definition file to provide information about the request object for Custom APIs.  The IntelliSense content I’ have added comes from a combination of the MSDN documentation and the Express.js library documentation, which is where these request and response objects originated.  My content is not comprehensive – I’ve only documented the items that were immediately relevant to me, but there’s nothing to stop others from adding more content – the Express.js documentation for the request object can be found here and the documentation for the response object can be found here.

The content I added to the mobileservices.intellisense.js file is:

/* Custom API Augmentations */ service = { ///<field name="push" type="push">Returns an object used to access the the various push notification proxies.</field> push: push, ///<field name="tables" type="tables">Returns an object used to access the the tables in this instance.</field> tables: tables, ///<field name="mssql" type="mssql">Returns an object used to access the mssql instance.</field> mssql: mssql, } ApiRequest = function ApiRequest() { ///<summary>Faux type used only for providing IntelliSense in Custom API scripts. DO NOT CREATE INSTANCES.</summary> } ApiRequest.prototype = { ///<field name="headers" type="Object">Returns a collection of all the message headers, as a JSON object. Individual headers are obtained by calling the header function.</field> headers: headers, ///<field name="query" type="Object">Used to access the parsed query-string.</field> query: query, ///<field name="service" type="service">Provides access to mobile service-specific resources.</field> service: service, ///<field name="user" type="User">Returns the user object which contains information about the client sending the request.</field> user: user, header: function (headerValue) { /// <summary>Returns a JSON representation of the named header-value from the HTTP request headers sent in a custom API request.</summary> /// <param name="headerValue" type="string">The name of the header to locate.</param> } } ApiResponse = function ApiResponse() { ///<summary>Faux type used only for providing IntelliSense in Custom API scripts. DO NOT CREATE INSTANCES.</summary> } ApiResponse.prototype = { send: function (status, body) { ///<signature> ///<summary>Sends a response.</summary> ///<param name="body" type="Buffer">When a Buffer is given the Content-Type is set to 'application/octet-stream' unless previously defined with the set command.</param> ///</signature> ///<signature> ///<summary>Sends a response.</summary> ///<param name="body" type="String">When a String is given the Content-Type is set defaulted to 'text/html'.</param> ///</signature> ///<signature> ///<summary>Sends a response.</summary> ///<param name="body" type="Array">When an Array or Object is given the response will include the JSON representation.</param> ///</signature> ///<signature> ///<summary>Sends a response.</summary> ///<param name="body" type="Object">When an Array or Object is given the response will include the JSON representation.</param> ///</signature> ///<signature> ///<summary>Sends a response.</summary> ///<param name="status" type="Number">The HTTP response code. When a Number is given without any of the previously mentioned bodies, then a response body string is assigned for you. For example 200 will respond will the text 'OK', and 404 'Not Found' and so on.</param> ///</signature> ///<signature> ///<summary>Sends a response.</summary> ///<param name="status" type="Number">The HTTP response code.</param> ///<param name="body">A body element as defined in the other signatures.</param> ///</signature> }, set: function (field, value) { ///<signature> ///<summary>Set header field to value, or pass an object to set multiple fields at once.</summary> ///<param name="field" type="String">The header field name.</param> ///<param name="value" type="String">The value to set for the header field.</param> ///</signature> ///<signature> ///<summary>Set header field to value, or pass an object to set multiple fields at once.</summary> ///<param name="values" type="Object">A JSON Object consisting of header field/value pairs.</param> ///</signature> } }

With that in place, it is still necessary to include some “helper” XML comments in order for Visual Studio to “connect the dots” between the Custom API function signature and the new IntelliSense:

exports.post = function (request, response) { /// <param name="request" type="ApiRequest"></param> /// <param name="response" type="ApiResponse"></param>

And with that, we now have IntelliSense in our Custom API script:

image

Wrapping Up

I have it on good authority that the Mobile Services team is continuing to work on ways to enhance the script editing experience, so it is likely that some of these steps will only be temporary.  But in the interim, the inclusion of these IntelliSense aids should make editing WAMS script files in Visual Studio considerably simpler.

Managing Windows Azure Mobile Services (WAMS) Server Scripts with Microsoft Visual Studio Tools for Git

Windows Azure Mobile Services (WAMS) has come a long way in a few short months.  At the 2013 Build conference in San Francisco, Microsoft announced more than the service’s General Availability date – it also showed that the service had been integrated into the Visual Studio 2013 Preview in several key places.  These included a “Connected Services Manager” that will augment an existing project to connect with a new or preexisting WAMS instance, an entry for WAMS in the Server Explorer panel that allows viewing and editing the server-side data table business logic scripts (with access to the other WAMS script elements expected to be added over time), and a Push Notification Wizard that facilitates connecting an existing Windows Store app to a WAMS instance.  These features are detailed in this post on the Visual Studio Blog.  The expectation is that these integration points are expected to be enhanced as Visual Studio 2013 is updated to its RTM version.

One of the more recent features added to WAMS itself has been the integration of Git-based source control for the server scripts (as of this writing, this feature is currently in Preview.)  This integration provides several advantages for managing a WAMS service’s scripts.  First, it allows for scripts to be edited locally /offline using desktop file editing tools, including Visual Studio.  Changes can be managed through the local Git repository until they are ready to be synchronized to the server.  What’s more, this arrangement also allows access to some of the WAMS script-related content that is not (presently) available through the WAMS management portal (though access to these files can also be obtained from the command-line management tools.)

To mostly round out the collection of the tools will be discussed here, the Team Foundation Server Power Tools team at Microsoft has released the Visual Studio Tools for Git, which is an extension that allows Visual Studio’s Team Explorer to integrate with Git.  This integration includes using the Team Explorer GUI to manage and connect to local repositories, as well as to track changed elements in a selected repo, and managing branches, commits, and syncs in that repo.  As of this writing, the extension is at version 0.9.5.

This post will explore how the new integrated Visual Studio tools for Git can be used to provide GUI-based source-controlled management for client-side editing of the scripts belonging to a Windows Azure Mobile Services instance.

Enabling Source Control in a WAMS Instance

The first step in the process is to enable Git Source Control for the account which owns the WAMS instance, if it has not already been set up for that account.  This process is documented here.  Basically, the steps entail:

  • – If this is the first time a Mobile Service Git repository is being set up for the current Azure subscription:
    • – From the WAMS Management Portal “Dashboard” page for the desired service, select “Set up source control”
    • – Provide a username and password to be used for access to mobile service Git repositories within the subscription.  These credentials can be changed later by selecting the “Reset your source control credentials” link on a WAMS Dashboard page for any Mobile Service attached to the same subscription.
  • – Copy the Git URL from the service instance’s Configure tab.

image

Connect to the Git Repository from Visual Studio

The next step is to connect to the server-side repository that was just created and clone it to the local machine.  This (and many of the remaining steps) can be accomplished via several Git tools, including the command line, but the focus here is on using Visual Studio (for the most part, I prefer to leave the command line to build scripts and for hacking into the Matrix.)  Once the Visual Studio Tools for Git extension has been downloaded and installed, open Visual Studio 2013 and select the Team Explorer pane (if necessary, it can be found in the View menu.) 

Select Connect (the icon looks like a the male end of a 2-prong extension cord)

image

In the ensuing Connect dialog, select Clone to do the initial setup of the local repo as a clone of the server repository.  This will show a couple of text boxes – the top one is used to provide the URL to the remote repository – paste the URL that was copied earlier from the WAMS Management Portal.  In the second one, type in or browse to the local directory path into which the repository should be cloned.

image

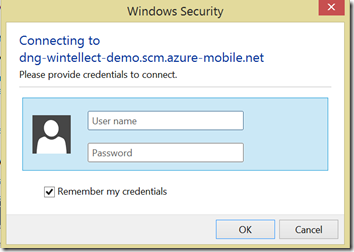
When you press the Clone button, you will be prompted for your server-side Git repository credentials.

image

…and after entering these credentials, you will have a local clone of the WAMS repository.

Examining the WAMS File Structure and Script Files

If you right-click on the new repository entry in the Team Explorer Connection Panel, you will see context menu options which include one for opening the repository in File Explorer.

image


The folder you open will contain a file and single subfolder titled “service”.  Within the service folder are the folders that contain the WAMS script content.  These folders and their purpose are listed below:

  • api: contains 2 files per Custom API defined in the WAMS portal.  The first file is a JavaScript (api name.js) file containing the script itself and the second is a JSON metadata file (api name.json) that describes the permission level required for each custom api script action.
  • scheduler: contains a JavaScript file (scheduled job name.js) for each defined scheduler script.
  • shared: contains scripts and/or Node.js modules that can be reused by other scripts in the service instance.  Note that there is no browser in the portal (at present) for files in this folder.
  • tables: contains between 1-5 files per defined table in the WAMS instance.  These files minimally include a JSON metadata file (table name.json)  For any modified table action script (read, insert, update, delete), there is also a corresponding JavaScript file (table name.operation.js)

Note #1: Each folder also includes a text md file that describes the intended contents of the folder and any layout constraints for each file. 

Note #2: For the most part, with the exception of the “shared” folder, the files should be “seeded” by creating the desired named item server-side and then syncing the repository.  WAMS often has to spin up other infrastructure elements in addition to just the scripts, such as database tables and entries for the scheduler. 

For Table scripts, the table can be created in the Visual Studio Server Explorer, but the individual table operation script files won’t be brought down by a Sync operation until the corresponding scripts is modified in some way – the change can be as simple as adding a comment.  Once the file has been altered and saved to the server, using Sync will fetch the file to the local repository.  The WAMS instance context menu (with the Create Table option) in the Server Explorer is shown below, along with a script that has been modified with nothing but a comment.

image              image

The screenshot below shows after the file above has been saved to the server from within the Server explorer, after doing a Sync of the Git repositories, the local folder has been updated with the table’s corresponding read script file.

image

Note that generating files this way is probably best left only for initially “seeding” the files, thus leaving day-to-day editing to an operation that is covered by source control and includes change tracking, etc.

Working with the Visual Studio Git Tools

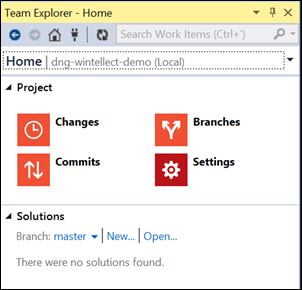
From the Connections panel, opening one of the repositories (double-click or right-click and select Open) displays the Home panel for the selected repository.

image

Once the necessary files have been synced to the local repository, the files within the folders in the repository can be edited on the local machine and the changes will be tracked by Git.  These changes can be seen in Visual Studio by bringing up the Changes Panel.  In the illustration below, the “read” script file for the “blogdemo” table has been modified locally (in fact, it was opened in Visual Studio and edited there to take advantage of Visual Studio’s JavaScript editing tools.  Any text editor could have been used, however.)

image

Note that there’s also an entry for “demosharedcontent.js” in the Untracked Files listing.  To include the file, simply drag it (or its containing folder) up and drop it in the “Included Changes” section:

image

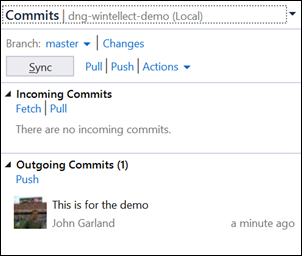
Once the collection of changed files that is to be committed to the local repository is ready, a commit message (comment) can be entered and the Commit button can be pressed.  Pressing the Commits link from this panel, returning to the home panel and selecting the Commits button, or selecting the Commits pulldown at the top of the TFS explorer will show the current set of outgoing and incoming Commits available for Syncing with the Server.

image

Pressing the Sync button once again synchronizes the script changes with the WAMS service.  Examining the table script in the WAMS Management Portal shows that the change in fact has been uploaded to the server:

image

If the Sync results in conflicts that Git cannot resolve, (the same word was changed both in the client and the server, for example) the Sync will indicate so, and a list of conflicts will be displayed:

image

The conflicts can be examined in detail and adjusted using the 3-way merge tool that comes with Visual Studio (with apologies for my typos):

image

Once the Merge is committed, it can be synced to the server.

The final working panel that hasn’t been shown yet is the Branches panel, which allows management of branches in the selected local repository.

image

Wrapping Up

While Windows Azure Mobile Services currently benefits from several points of integration into the Visual Studio 2013 IDE, the addition of the Visual Studio Tools for Git offers an additional tool to help with the management of server-side scripts.  For what it’s worth, the Visual Studio Tools for Git also works with Visual Studio 2012, and supports the same kinds of source control management as was shown here in Visual Studio 2013 Preview, except that Visual Studio 2012 lacks the additional WAMS integration points such as the entry in the Server Explorer.  Nonetheless, look for the integration of these tools to become even richer as WAMS, Visual Studio 2013 , and even the Visual Studio Tools for Git are enhanced over the next few months.

Proceed with Caution – Windows Phone 8 App Lifecycle Events vs Async Methods

“We are on the path to Windows and Windows Phone Convergence” (//Build 2012 – How to Leverage your Code Across WP8 and Win8, Slide 6)

I often hear people saying the phrase “Windows 8 Phone” when they are talking/asking about “Windows Phone 8”.  Throughout presentations that I’ve given and other discussions I’ve had over the past several months that covered the topic of Windows Phone 8, I’ve made it a point to emphasize that Windows Phone 8 is NOT a Windows 8 Phone.  By doing so I’m not trying to be a nit-picky jerk, but rather I’m trying to underscore that there are important differences – both obvious and subtle – between the Windows Store App and Windows Phone platforms, and there are some major pitfalls that developers can stumble into if they are not aware of the way that some of the key platform technologies work.  One situation where these nuanced platform differences comes to light is in differences in the proper use of asynchronous operations within the various lifecycle events exposed by these two platforms; specifically the events pertaining to suspension/deactivation and application closing.

Huh?  To put it simply, the APIs available to Windows Store App development include tools that developers can use to safely(*) include asynchronous method calls when their application is being suspended.  The Windows Phone 8 APIs that support Deactivation and Closing do not include these tools, and it can be tricky to notice the problems that can arise.

Background

OK… time for some background which should serve to highlight the problem.  There are 2 general areas to cover.  First, there are the application lifecycles that are exposed by Windows Store and Windows Phone 8 apps.  Second, some background as to the nature of the new async/await-based asynchronous programming model needs to be provided.

The Windows Phone and Windows Store Application Lifecycles

Both Windows Phone and Windows Store apps (hereafter WP and WS)  feature a lifecycle that is a bit different from that of a traditional desktop application.  While desktop apps are allowed to constantly run (and make unfettered use of precious device resources), the execution lifetime of WP/WS apps is primarily(**) limited to only when the app is currently in the foreground.  In WP, there’s only one app running in the foreground at a given time, where in WS there are currently at most two, depending on whether one is running in Snapped View.  When the apps are either being closed or losing their foreground status, events are provided which allow program code to execute as a result.  Note that while this code can delay the related app lifecycle event from completing, they cannot cancel/prevent it – there is no way to prompt the user to ask “are you sure you’d like this to happen? Yes/No?”  In fact, there’s also the notion of a “death clock” – the apps have a limited amount of time to execute their cleanup code, or the OS will simply kill the app.  With this in mind, it is worth giving strong consideration in WP/WS apps to a “save as you go” approach over the more traditional “save at the very end” approach that was quite common in Desktop apps.

As a simple overview, in WP apps, when a user brings up a different app through the use of one of the device hardware buttons or by responding to a Toast notification or a Reminder, or by switching to another application via a file or protocol association (or one of several other ways), the app enters a dormant state. On its way to this state, the OS gives the app an opportunity to handle a Deactivated event.  The app then has 10 seconds to complete any operations, and once execution of this handler has completed, the OS then moves the app along to this end-state.  Likewise, when an app is closed by using the Back button from the first page in the app’s backstack, the app can elect to handle a Closing event.  Note that the OS may decide to exit a running application that has been deactivated, either due to device memory pressure or if the app is relaunched from the Start or Tile screens, in which case the Deactivated event has been called, but since the app is already dormant, the Closing event will not be called. (App Activation & Deactivation for Windows Phone)

Similarly, in WS apps, when a user brings up a different app through a contract activation (including the Launch contract which occurs when a Tile is clicked form the Start screen), the OS invokes the app-losing-focus’s Suspending event.  This event is also raised if the app is being explicitly closed by dragging/swiping from the top of the screen to the bottom, or the OS is rebooting, etc.  There is no “dedicated” close method that will be called. (Windows Store App Lifecycle Overview)

In either case, these event handler methods offer the last opportunity for an app to persist user state information to disk, potentially to be re-accessed the next time the app is activated/launched/awakened/etc.  Once either the app completes processing these methods or the aforementioned “death clocks” expire, control is returned to the OS to complete its suspension/shutdown operations.  (This last sentence is very important.)

The Task Based Asynchronous Pattern and the Async/Await Keywords

One of the core concepts that applies to development with the new Windows Runtime APIs (WinRT) is that any API call that *could* potentially take more than 50ms to complete has been made asynchronous, with no synchronous equivalent.  Among other consequences, this continues a trend first seen in other Microsoft APIs of ensuring that developers do not create UI’s that lock up while some long-running operation is underway, and if managed correctly, can make applications seem more responsive than ever before.  However, developers who had previously not delved into the nuances of asynchronous programming are now required to do so.  To that end, the async and await keywords added to the C# language offer substantial help, but it is still important to understand what’s going on “under the hood.”

A detailed description of how the compiler reacts to async/await in code it encounters is beyond the scope of this article, and a great explanation is available in Chapter 28 of Jeff Richter’s book “CLR Via C#, 4th Edition”.  To put it simply, when the compiler encounters an async function, behind-the-scenes it generates a state machine and rearranges the code into various states the state machine manages.  The state machine waits for code marked with “await”, and when that code signals as “complete”, the subsequent code is executed, etc.  This is the “magic” that allows the code to be written linearly, while still respecting the asynchronous execution.

The following class shows one of the simplest implementations I could think of:

   1: public class SimpleAsync

   2: {

   3:     public async Task DoSomething()

   4:     {

   5:         await Task.Delay(1000);

   6:         DoSomethingElse();

   7:     }

   8:  

   9:     public void DoSomethingElse()

  10:     {

  11:     }

  12: }

In this case, the compiler loosely interprets the code as the following:

  • Start Task.Delay for 1000ms (on another thread), and when it completes, execute DoSomethingElse().
  • Then signal the Task (implied if return type is void) that execution has completed.
  • If the return type is Task<T>, the function’s return type will be used as the T value.
  • While that is going on, go ahead and return control to the calling function
   1: public class SimpleAsyncThatReturnsSomething

   2: {

   3:     public async Task<Int32> ReturnSomething()

   4:     {

   5:         await Task.Delay(1000);

   6:         return ReturnAValue();

   7:     }

   8:  

   9:     public Int32 ReturnAValue()

  10:     {

  11:         return 42;

  12:     }

  13: }

The Problem

OK…so what’s the big deal?  Some readers may have figured it out from the background – don’t worry if you haven’t – some very competent developers have fumbled this pretty badly.  The crux of the problem lies when you merge the concept of the applications’ lifecycle closing events with the execution of asynchronous code.  Remembering the sentence I called attention to earlier regarding the processing of the Deactivated/Closing events (WP) or the Suspending event (WS):

Once either the app completes processing these methods or the aforementioned “death clocks” expire, control is returned to the OS to complete its suspension/shutdown operations.

But if these methods are made asynchronous using async, the compiler will generate a state machine, moving the execution from the first await forward into alternate threads and returning to the calling method at that point….at which time, the OS will proceed with its suspend/shutdown operations, blithely ignoring whatever may be going on in those other threads.  If the asynchronous method in question happens to be a file-save, congratulations!  You may have just saved half a file!  Or more…or less.  (Have you heard the one that goes “Why did the multithreaded chicken cross the road?  To other side get to the.  Ask me again…”)

This can be seen with the following WP code:

   1: // Code to execute when the application is deactivated (sent to background)

   2: // This code will not execute when the application is closing

   3: private async void Application_Deactivated(object sender, DeactivatedEventArgs e)

   4: {

   5:     await DumpText();

   6: }

   7:  

   8: // Code to execute when the application is closing (eg, user hit Back)

   9: // This code will not execute when the application is deactivated

  10: private async void Application_Closing(object sender, ClosingEventArgs e)

  11: {

  12:     await DumpText();

  13: }

  14:  

  15: private async Task DumpText()

  16: {

  17:     foreach (var currentTime in Enumerable.Range(0, 10).Select(i => DateTime.Now.ToString("T")))

  18:     {

  19:         // Substitute your own asynchronous process

  20:         await Task.Delay(1000);

  21:         Debug.WriteLine(currentTime);

  22:     }

  23: }

And the following WS code:

   1: private async void OnSuspending(object sender, SuspendingEventArgs e)

   2: {

   3:     await DumpText();

   4: }

   5:  

   6: private async Task DumpText()

   7: {

   8:     foreach (var currentTime in Enumerable.Range(0, 10).Select(i => DateTime.Now.ToString("T")))

   9:     {

  10:         // Substitute your own asynchronous process

  11:         await Task.Delay(1000);

  12:         Debug.WriteLine(currentTime);

  13:     }

  14: }

In the examples above, the DumpText function may start outputting content to the Debug Window, though it is likely it won’t even get to the first write, and highly unlikely that it will get all the way to 10.

But it Works in Windows Store Apps…

This is partially true.  WS apps introduce the concept of “deferrals” at critical places where the OS and asynchronous operations may possibly collide – and it just so happens that suspension is one such critical place.  A deferral can be requested from the SuspendingEventArgs that are part of the event handler signature by using the GetDeferral method.  When a deferral is requested, the OS will wait for the deferral instance’s Complete method to be called before it proceeds with its normal suspension/shutdown operations***.  (Shameless self promotion alert: I discuss this in the “Application Suspension” of Chapter 3 – Application Life Cycle and Storage in my book “Windows Store Apps Succinctly.”)  This process is illustrated in the following code, which will successfully get all the way through the desired 10-count:

   1: // The Suspending event handler with an asynchronous operation. 

   2: private async void OnSuspending(Object sender, SuspendingEventArgs e)

   3: {

   4:     var deferral = e.SuspendingOperation.GetDeferral();

   5:     //TODO: Save application state and stop any background activity.

   6:     await DumpText();

   7:     deferral.Complete(); 

   8: } 

Great!  Now all we have to do is be sure to use deferrals in our Windows Phone Deactivated and Closing event handlers and we’re all set!  There’s just one small problem…the DeactivatedEventArgs and ClosingEventArgs provided by those methods have no notion of deferrals…for that matter, WP8 doesn’t have any such notion as a whole.  Remember – we are on a path to convergence…we have yet to achieve said convergence.

image

Great…Now What?

So what are our options in this situation?

  • Use the synchronous WP8 APIs.  In the case of storage, the IsolatedStorage APIs that are part of the WP7 SDK are still available in WP8.  Since these calls are synchronous, it avoids the whole “I’ve returned from the method but am not done with my work” issue that is at play.  However, for code-reuse/compatibility, it isn’t exactly an ideal option (though the lifecycle events are different enough between the platforms that this may not be a big deal) and in general, it feels like a bit of “looking backwards.”
  • Though it has been mentioned before, it should be repeated for completeness – it may not be ideal to “wait until done” to persist content to disk, if that is what the desired async operation involved here happens to be.  It may be better to pursue an approach that involves “save as you go.”

Wrapping Up

In the end, I hope that I have illustrated that it is quite important that developers be aware of the nuances of asynchronous code and the problems than can occur if asynchronous code is used in the exit-oriented event handlers in Windows Phone apps.  Ultimately, the simplest guidance is to not make these handlers asynchronous until such a point that the Windows Phone API is given its own mechanism – similar to that afforded to the Windows Store API or otherwise- for handling asynchronous calls in its exit handlers.

While async & await are powerful additions to our developer toolboxes, but “with great power comes great responsibility.”  It is important to understand their true functionality.  A few resources that can aid in such an understanding include:

* I say “safely” with some trepidation – there are a lot of factors that can impede any perceived “safety” when it comes to executing code in these quasi-shutdown methods, and the nature of asynchronous code inherently adds complexity to the number and nature of possible things that can go wrong.

** Another “weasel word” – there are circumstances where these platforms do allow apps (or some limited portion of the app) to run, such as Background Tasks/Agents.

*** Note that deferrals do not stop the “death clock”…the method can still time-out even if a deferral has been requested.  The only thing the deferral does is prevent the normal course of completion signaling that otherwise takes place when the method returns to its caller.

LIDNUG Webinar Presentation Materials

Many thanks to the participants, organizers, and sponsors of today’s LIDNUG webinar – “Putting the Cloud in Your Pocket Pt1 – Using Windows Azure to Build Cloud-Enabled WP7 Apps.”  I especially appreciate the patience of those who attended as we struggled to do the best we could to resolve the LiveMeeting technical issues that dogged us during the presentation.  For what it is worth, prior to the presentation, the LIDNUG folks made sure we did a technical walkthrough to do everything possible to mitigate the possibility of running into these kinds of glitches…alas, despite our best efforts, the “demo gods” decided to frown upon us today.

As I mentioned during the talk, I have gone ahead and posted the code (along with the slide that were available for download during the talk) here.  As is often the case with talks about this topic, the demo contains keys and other “private” information that is specific to my own Azure account.  With that in mind, I have sanitized/removed the private content from the posted demo code, and included a document “ACS Update Instructions” alongside the code zip file that describes the steps necessary to get yourself up and running with your own Azure subscription.

As we mentioned during the talk, I will be working with the LIDNUG folks to make sure we are able to post a complete recording of the presentation.  Stay tuned for updates.  In the meantime, please be sure to check out additional upcoming Wintellect events as well as upcoming LIDNUG events, and please be sure to visit our webinar’s sponsor – Syncfusion.

Boston Azure Bootcamp Presentation Materials

I had a tremendous time this weekend presenting alongside Bill Wilder, Michael Collier, John Zablocki, and Jim O’Neil at the Boston Azure Bootcamp event in Cambridge, MA.  The topic once again covered the concepts of using Windows Azure to enhance mobile Windows Phone application and general mobile development considerations, and went beyond my demos to include a hands on lab that most everyone seems to have enjoyed.

As promised, the slide and code content I referred to in my talk can be found here.  I mentioned to a few who asked – there are some values in the lab that are specific to the ACS namespaces I have set up.  I am including in the code file a word doc that indicates how to set up the ACS values for the demo code in question.

Again, many thanks!  I’m looking forward to hearing about how folks are using Azure to add cloud “goodness” to their mobile applications.

CodeStock 2012 Presentation Content

I would like to thank the attendees of my “Putting the Cloud in Your Pocket – A Guide to Using Windows Azure to Build Cloud-Enabled Windows Phone Apps” talk at the recent Codestock event – especially considering the early hour following the previous night’s fun.  The slide and code content I referred to in my talk can be found here.   Also, many thanks go out to the event organizers – I had a great time traveling down to Tennessee for this event, and hope to maybe do so again in the future.

As can be expected, I removed my custom/personal ACS information from the sample code.  This includes the acsnamespace and realm resources in the AccessControlResources.xaml file within the Phone project, and the SwtSigningKey, realm, and namespace values from the MVC project’s web.config file.  These values can be obtained from a new or existing ACS namespace as follows:

ACS Configuration Values

These values are available in the following locations (Note – this is based on the current Silverlight-based management portal.  Precise locations may shift slightly when this content moves to the newer HTML5-based portal.)

The namespace value is the namespace you indicated when creating the ACS instance.

image

The Realm is specific to the relying party application that has been configured, and can be found on the Relying Party Application page:

image

The symmetric key can be obtained from the Access Control Service management portal, selecting Certificates and Keys, selecting (and/or creating) a Symmetric Key specific to the namespace:

image

image

image

Async CTP

Also, please remember that the code made use of the Async CTP assembly.  This was not strictly required, but was instead put in place to help improve the code flow instead of using Lambdas or complete methods for the various callback functions used when interacting with Azure Storage.  Information about the Async CTP is available here.

Metro XAML Nugget: App Bar AutoMagic

You may have noticed that in many places of the Windows 8 Metro UI, as well as many Metro applications where list content can be selected, that making a selection automatically/magically (“automagically”) brings up one or more app bars.  This is consistent with the “Guidelines and checklist for app bars” published in the Metro Style Apps Dev Center:

Do place contextual commands on an app bar and show that bar programmatically.

If you have commands that are specific to the mode of the app, such as the Crop command appearing only when a photo is selected, place those commands on an app bar and show it programmatically while in that context.

If you have commands that can be performed whether content is selected or not, keep those commands on the bar if you have enough room.

Do set the app bar’s dismissal mode to sticky when displaying contextual commands.

If you have contextual commands on an app bar, set the mode to sticky while that context exists and turn off the sticky mode when the context is no longer present (such as when a photo is deselected). In sticky mode, the bar doesn’t automatically hide when the user interacts with the app. This is useful for multi-select scenarios or when the context involves interaction such as manipulating crop handles. The bar stays visible while the user performs their actions. The user can still hide the bar by swiping the top or bottom edge of the screen and they can show it again with an edge swipe.

One place where this behavior can be seen occurs when selecting and deselecting tiles in the Metro Start Screen.

image

Of course, this is nice and all, but sitting down to implement this (it isn’t out-of-the-box behavior) for the Metro XAML list controls (ListBox, ListView, GridView), I figured I had several options.  First, I could just handle the SelectionChanged event and in the codebehind I could programmatically bring up and/or collapse the page’s app bar(s).  That would do for one-off code, but its hardly the approach I would want to take for a more robust application.  A second option is to bind the list’s SelectedItem(s) property to property on the page’s ViewModel, and either use a related property or a ValueConverter to bind to the AppBar’s properties.  This felt a little bit much for wanting to simply alter the behavior of one control to react to the behavior another control.  There are other solutions that fell into this category as well (ViewState etc.)  What I ended up coming up with is a quasi-Behavior using Attached Properties that makes this (ahem) behavior reusable and quite easy to wire up.

Note: Another similar approach would be to actually use Behavior<T>.  Although this component of the Blend SDK is not included with the WinRT tools, some folks have published the equivalent WinRtBehaviors project on CodePlex at http://winrtbehaviors.codeplex.com/.

As I mentioned, at the heart of this implementation are an attached property and a set of Flags indicating which app bar(s) should react to the selection change.

   1: [Flags]

   2: public enum AppBarDisplayFlags

   3: {

   4:     None = 0,

   5:     Bottom = 1,

   6:     Top = 2,

   7:     BottomAndTop = 3,

   8: }

   9:  

  10: public static readonly DependencyProperty AppBarDisplayOnListSelectionProperty = 

  11:     DependencyProperty.RegisterAttached(

  12:         "AppBarDisplayOnListSelection", 

  13:         typeof(AppBarDisplayFlags), 

  14:         typeof(Selector), 

  15:         new PropertyMetadata(AppBarDisplayFlags.None, OnAppBarDisplayOnListSelectionChanged));

  16:  

  17: public static void SetAppBarDisplayOnListSelection(Selector element, AppBarDisplayFlags value)

  18: {

  19:     element.SetValue(AppBarDisplayOnListSelectionProperty, value);

  20: }

  21:  

  22: public static AppBarDisplayFlags GetAppBarDisplayOnListSelection(Selector element)

  23: {

  24:     return (AppBarDisplayFlags)element.GetValue(AppBarDisplayOnListSelectionProperty);

  25: }

Nothing really fancy there…just a simple attached property – I opted to indicate the owner as the Selector class instead of the containing class simply for convenience.  The important part is that the attached property is defined with a callback to be used when the value of the attached property is changed – OnAppBarDisplayOnListSelectionChanged.

In the property changed handler, a check is performed to see if the code is running in the designer – if so, everything bails out.  Otherwise, the selector to whom the property is being applied is obtained (if not found, bail out).  The selector and the value of the flags are then passed to a helper method to handle hooking up to the pertinent events.

   1: private static void OnAppBarDisplayOnListSelectionChanged(DependencyObject dependencyObject, DependencyPropertyChangedEventArgs dependencyPropertyChangedEventArgs)

   2: {

   3:     // Don't hook up the event listeners when running in the designer

   4:     if (Windows.ApplicationModel.DesignMode.DesignModeEnabled) return;

   5:  

   6:     // Identify the selector to which this property has been applied (if none, then do nothing)

   7:     var selector = dependencyObject as Selector;

   8:     if (selector == null) return;

   9:  

  10:     var selectedFlags = (AppBarDisplayFlags)dependencyPropertyChangedEventArgs.NewValue;

  11:     HookEvents(selector, selectedFlags);

  12: }

In HookEvents, as long as one of the app bars is of interest, listeners are registered for the selector’s Unloaded and SelectionChanged events.  Some preemptive housekeeping is also performed to first unhook the same events in order to prevent leaks.  The Unloaded event merely unhooks these same events to once again prevent leaks.

The big workhorse is the HandleSelectionChanged event handler.  First, the Visual Tree is traversed until an ancestor of the Selector is found that happens to be a Page – which is presumed to be the site of the app bar(s) being affected.  Then the current state of the setting to show the top and/or bottom app bars is determined, and finally, if an item is selected, the appropriate app bars are shown.  If no item is selected, the appropriate app bars are collapsed.

   1: private static void HandleSelectionChanged(Object sender, SelectionChangedEventArgs e)

   2: {

   3:     var selector = sender as Selector;

   4:     if (selector == null) return;

   5:  

   6:     // Traverse the selector's parents to find the firet "page" element

   7:     var containingPage = selector.GetVisualAncestors().OfType<Page>().FirstOrDefault();

   8:     if (containingPage == null) return;

   9:  

  10:     var currentFlags = GetAppBarDisplayOnListSelection(selector);

  11:     var showBottomAppBar = (currentFlags & AppBarDisplayFlags.Bottom) == AppBarDisplayFlags.Bottom;

  12:     var showTopAppBar = (currentFlags & AppBarDisplayFlags.Top) == AppBarDisplayFlags.Top;

  13:  

  14:     if (selector.SelectedItem != null)

  15:     {

  16:         // An item has been selected - show the relevant app bars

  17:         if (showBottomAppBar) ShowAppBar(containingPage.BottomAppBar);

  18:         if (showTopAppBar) ShowAppBar(containingPage.TopAppBar);

  19:     }

  20:     else

  21:     {

  22:         // Nothing has been selected - hide the relevant app bars

  23:         if (showBottomAppBar) HideAppBar(containingPage.BottomAppBar);

  24:         if (showTopAppBar) HideAppBar(containingPage.TopAppBar);

  25:     }

  26: }

Once the project containing this code has been compiled, the attached property is available to be set to Selector-derived UI elements.

   1: <GridView

   2:     x:Name="itemGridView"

   3:     AutomationProperties.AutomationId="ItemGridView"

   4:     AutomationProperties.Name="Grouped Items"

   5:     Margin="116,0,40,46"

   6:     ItemsSource="{Binding Source={StaticResource groupedItemsViewSource}}"

   7:     ItemTemplate="{StaticResource Standard250x250ItemTemplate}"

   8:     SelectionMode="Multiple"

   9:     local:AppBarExtensions.AppBarDisplayOnListSelection="Bottom">

Obviously, this seems like a long way to travel – the value is realized when there are multiple Selector’s scattered throughout an application where this behavior is to be applied, and/or when this code is shared across multiple applications.  The entire code for the class containing the attached property follows:

   1: public static class AppBarExtensions

   2: {

   3:     [Flags]

   4:     public enum AppBarDisplayFlags

   5:     {

   6:         None = 0,

   7:         Bottom = 1,

   8:         Top = 2,

   9:         BottomAndTop = 3,

  10:     }

  11:  

  12:     public static readonly DependencyProperty AppBarDisplayOnListSelectionProperty = 

  13:         DependencyProperty.RegisterAttached(

  14:             "AppBarDisplayOnListSelection", 

  15:             typeof(AppBarDisplayFlags), 

  16:             typeof(Selector), 

  17:             new PropertyMetadata(AppBarDisplayFlags.None, OnAppBarDisplayOnListSelectionChanged));

  18:  

  19:     public static void SetAppBarDisplayOnListSelection(Selector element, AppBarDisplayFlags value)

  20:     {

  21:         element.SetValue(AppBarDisplayOnListSelectionProperty, value);

  22:     }

  23:  

  24:     public static AppBarDisplayFlags GetAppBarDisplayOnListSelection(Selector element)

  25:     {

  26:         return (AppBarDisplayFlags)element.GetValue(AppBarDisplayOnListSelectionProperty);

  27:     }

  28:  

  29:     private static void OnAppBarDisplayOnListSelectionChanged(DependencyObject dependencyObject, DependencyPropertyChangedEventArgs dependencyPropertyChangedEventArgs)

  30:     {

  31:         // Don't hook up the event listeners when running in the designer

  32:         if (Windows.ApplicationModel.DesignMode.DesignModeEnabled) return;

  33:  

  34:         // Identify the selector to which this property has been applied (if none, then do nothing)

  35:         var selector = dependencyObject as Selector;

  36:         if (selector == null) return;

  37:  

  38:         var selectedFlags = (AppBarDisplayFlags)dependencyPropertyChangedEventArgs.NewValue;

  39:         HookEvents(selector, selectedFlags);

  40:     }

  41:  

  42:     private static void HookEvents(Selector selector, AppBarDisplayFlags flags)

  43:     {

  44:         if (selector == null) throw new ArgumentNullException("selector");

  45:  

  46:         // Clear any "active" event handlers

  47:         UnhookEvents(selector);

  48:  

  49:         if (flags != AppBarDisplayFlags.None)

  50:         {

  51:             selector.Unloaded += HandleUnloaded;

  52:             selector.SelectionChanged += HandleSelectionChanged;

  53:         }

  54:     }

  55:  

  56:     private static void UnhookEvents(Selector selector)

  57:     {

  58:         if (selector == null) throw new ArgumentNullException("selector");

  59:  

  60:         selector.Unloaded -= HandleUnloaded;

  61:         selector.SelectionChanged -= HandleSelectionChanged;

  62:     }

  63:  

  64:     private static void HandleUnloaded(Object sender, RoutedEventArgs e)

  65:     {

  66:         UnhookEvents((Selector)sender);

  67:     }

  68:  

  69:     private static void HandleSelectionChanged(Object sender, SelectionChangedEventArgs e)

  70:     {

  71:         var selector = sender as Selector;

  72:         if (selector == null) return;

  73:  

  74:         // Traverse the selector's parents to find the firet "page" element

  75:         var containingPage = selector.GetVisualAncestors().OfType<Page>().FirstOrDefault();

  76:         if (containingPage == null) return;

  77:  

  78:         var currentFlags = GetAppBarDisplayOnListSelection(selector);

  79:         var showBottomAppBar = (currentFlags & AppBarDisplayFlags.Bottom) == AppBarDisplayFlags.Bottom;

  80:         var showTopAppBar = (currentFlags & AppBarDisplayFlags.Top) == AppBarDisplayFlags.Top;

  81:  

  82:         if (selector.SelectedItem != null)

  83:         {

  84:             // An item has been selected - show the relevant app bars

  85:             if (showBottomAppBar) ShowAppBar(containingPage.BottomAppBar);

  86:             if (showTopAppBar) ShowAppBar(containingPage.TopAppBar);

  87:         }

  88:         else

  89:         {

  90:             // Nothing has been selected - hide the relevant app bars

  91:             if (showBottomAppBar) HideAppBar(containingPage.BottomAppBar);

  92:             if (showTopAppBar) HideAppBar(containingPage.TopAppBar);

  93:         }

  94:     }

  95:  

  96:     private static void ShowAppBar(AppBar appBar)

  97:     {

  98:         if (appBar == null) return;

  99:  

 100:         appBar.IsSticky = true;

 101:         appBar.IsOpen = true;

 102:     }

 103:  

 104:     private static void HideAppBar(AppBar appBar)

 105:     {

 106:         if (appBar == null) return;

 107:  

 108:         appBar.IsOpen = false;

 109:         appBar.IsSticky = false;

 110:     }

 111:  

 112:     /// <summary>

 113:     /// Gets the ancestors of the element, up to the root.

 114:     /// </summary>

 115:     /// <param name="node">The element to start from.</param>

 116:     /// <returns>An enumerator of the ancestors.</returns>

 117:     public static IEnumerable<FrameworkElement> GetVisualAncestors(this FrameworkElement node)

 118:     {

 119:         var parent = node.GetVisualParent();

 120:         while (parent != null)

 121:         {

 122:             yield return parent;

 123:             parent = parent.GetVisualParent();

 124:         }

 125:     }

 126:  

 127:     /// <summary>

 128:     /// Gets the visual parent of the element.

 129:     /// </summary>

 130:     /// <param name="node">The element to check.</param>

 131:     /// <returns>The visual parent.</returns>

 132:     public static FrameworkElement GetVisualParent(this FrameworkElement node)

 133:     {

 134:         return VisualTreeHelper.GetParent(node) as FrameworkElement;

 135:     }

 136: }

Using the New Caller Information Attributes for Reliable Property Change Notifications

As anyone who has implemented the INotifyPropertyChanged interface knows, the fact that the PropertyChangedEventArgs takes a property name as a string means that you are one fat-fingered mistake away from a bug that can sometimes be difficult to track down.  If the property name supplied in the string doesn’t match the actual property name, the data binding (or other operations) that relies on this interface doesn’t work properly.

   1: public Int32 MyProperty

   2: {

   3:     get { return _myProperty; }

   4:     set

   5:     {

   6:         if (_myProperty != value)

   7:         {

   8:             _myProperty = value;

   9:             OnPropertyChanged("MyProperty");

  10:         }

  11:     }

  12: }

Lambda expressions and Expression Trees in .Net 3 brought a solution to the problem, where the compile-time checking could help ensure that a correct value was provided.  I blogged about this back in 2010 (https://blog.dotnetgator.com/2010/06/21/finding-binding-trouble/), and even cited my (then-future) coworker Jeremy Likness’s treatment of the same topic (http://csharperimage.jeremylikness.com/2010/06/tips-and-tricks-for-inotifypropertychan.html).

   1: public Int32 MyProperty

   2: {

   3:     get { return _myProperty; }

   4:     set

   5:     {

   6:         if (_myProperty != value)

   7:         {

   8:             _myProperty = value;

   9:             OnPropertyChanged(() => MyProperty);

  10:         }

  11:     }

  12: }

Now there’s a new feature in .Net 4.5 that provides yet another opportunity to ensure that INotifyPropertyChanged is implemented correctly – possibly in a simpler fashion than ever before, and with better performance than the Expression Tree/Lambda expression approach.

.Net 4.5 includes 3 new “Caller Information” attributes  – CallerFilePathAttribute, CallerLineNumberAttribute, and CallerMemberNameAttribute.  These three attributes are scoped to individual method parameters, and when used, they apply the indicated value from the CALLING METHOD to the called method’s attributed parameter at run time.  In our case, we’re interested in the CallerMemberName attribute, which we can use to automatically retrieve the property that is trying to raise the property change notification:

   1: private void OnPropertyChanged([CallerMemberName] String caller = null)

   2: {

   3:     var handler = PropertyChanged;

   4:     if (handler != null)

   5:     {

   6:         handler(this, new PropertyChangedEventArgs(caller));

   7:     }

   8: }

Note that the Caller Information attributes require a default value be supplied.

This reduces the overhead of a property in the class that provides this method to the following:

   1: public Int32 MyProperty

   2: {

   3:     get { return _myProperty; }

   4:     set

   5:     {

   6:         if (_myProperty != value)

   7:         {

   8:             _myProperty = value;

   9:             OnPropertyChanged();

  10:         }

  11:     }

  12: }

Of course, one important question is how does this method perform in comparison to either just providing a string, or using the Lambda/Expression Tree approach?  In my tests with iterations of between 1,000-500,000 property changes I saw between ~10-30% performance improvement over the Lambda/Expression Tree approach, and performance between ~20-30% lower than using a directly supplied string.

Note that the latest version of the MSDN documentation illustrating the implementation of the INotifyPropertyChanged interface (as of this writing) show the use of the CallerMemberName attribute – http://msdn.microsoft.com/en-us/library/ms229614(v=vs.110).aspx